

If your store processes payments in-person, or you’re planning on launching a brick-and-mortar location, you need to know how to set up a POS system.
Your POS, or Point of Sale system ensures you can access all the tools and resources you need to manage transactions, orders, and inventory.
Depending on the POS solution you choose (and your business structure), getting started can be as simple as downloading an app to a tablet or smartphone. However, even the most straightforward solutions do require a little configuration.
Here’s a quick summary of the POS setup steps you’ll need to take:
- Choose a POS system
- Asses your hardware needs
- Compare professional and self-service installation
- Configuring your software
- Set up inventory management systems
- Import data about your customers
- Create employee accounts (with secure permissions)
- Train your staff and deliver ongoing support.
The Step-by-Step Guide to POS Installation and Setup
The process of installing and configuring your point of sale system will vary depending on your chosen software, hardware, and business requirements. You’ll need to determine which devices you need, how many employees you’ll be working with, and what types of payments you’ll accept.
However, in all cases, there are some essential steps to follow:
Step 1: Choosing your POS System
Before you can setup your POS system, you need to decide which POS provider you’re going to work with. This means finding the POS software, and hardware that’s best-suited to your business. There are numerous options out there. We’ve reviewed some of the top options here to help you.
For the most part, choosing the right solution means focusing on ease of use, budget friendly pricing, and finding the specific features that support your business. Here are some of the features that may be necessary depending on your industry or niche:
- Retail: In the Retail world, your POS solution will need inventory management, for tracking inventory information in real-time, and support for multiple payment options (mobile wallets, Google and Apple Pay, PayPal, credit cards, etc). You may also need omnichannel sales features for selling online, and offline, and customer relationship management (CRM) tools.
- Restaurant: Alongside the features of a retail POS, a restaurant POS will also need specialist features for table mapping and floor planning, menu management, and ingredient-level inventory management. You might also need advanced payment options, for accepting tips, splitting checks, and attributing sales to specific staff members.
- Hospitality: Hospitality companies like hotels will need all the features of a retail POS, as well as event organization tools, and booking tools for room reservations. It also helps to find a POS system that allows you to collect feedback from customers with surveys.
- Service providers: Depending on the service you offer, you’ll need all the features of a retail POS, as well as online booking tools, appointment management and scheduling tools, and solutions for sending invoices to customers.
Step 2: Address Your Hardware Needs
As mentioned above, some POS software solutions allow companies to process payments with nothing more than a tablet or smartphone.
However, many business owners will also need additional hardware, such as a dedicated card reader, cash register, or retail POS register.
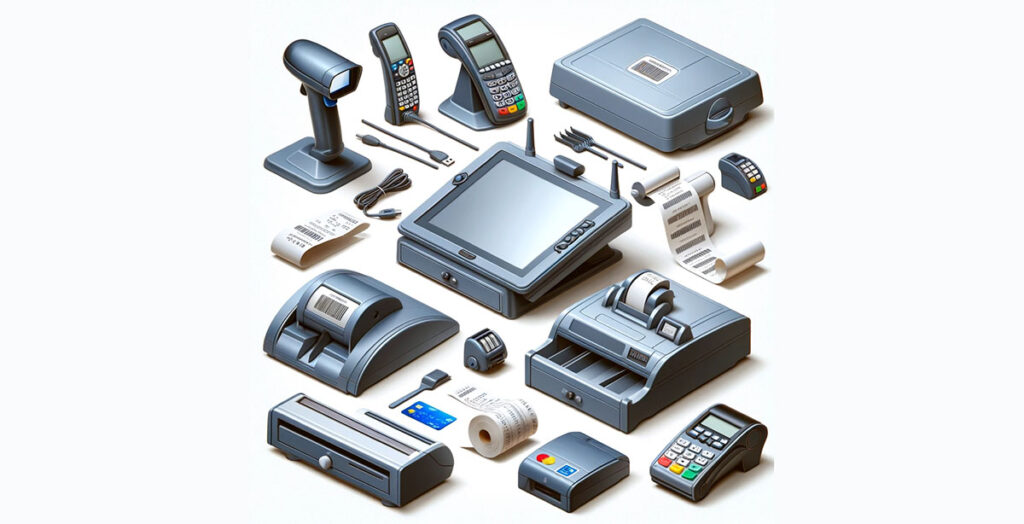
If you’re investing in restaurant POS systems, you may also need to consider other hardware components, such as kitchen displays and tableside payment processing tools.
Think carefully about the hardware elements necessary to run your business. Options range from receipt printer tools, to cash drawer options, Bluetooth barcode scanners, and Wi-Fi routers.
At a basic level, you should have at least a touchscreen device that allows you to access and use your POS software in any environment. It’s also worth making sure you’re familiar with the operating system your software uses, such as iOS or Android.
Make sure the hardware you use integrates seamlessly with the rest of your technology, such as smartphones, displays, and networking tools.
Another point to consider is whether you want to purchase, rent, or lease your hardware. If you have a limited budget, renting or leasing hardware can save you more money in the short-term, but it can be more expensive in the long-term.
If you want to own your POS system, but need to keep upfront costs low, you can consider working with a POS provider that offers “instalment payments”.
For instance, Square offers 12 and 24-month payment plans for a lot of its hardware. Alternatively, Toast offers access to hardware for free, in exchange for higher payment processing rates.
Step 3: Decide Between DIY and Professional Installation
In some cases, you won’t have a choice between a DIY POS setup and professional installation. Some more complex systems, like Revel POS require professional configuration. However, simpler options can be easy to implement yourself.
DIY Installation
If you have a simple store setup and don’t need to implement a lot of devices, a DIY installation might be the right option. For instance, you can set up a Square POS with a tablet and card reader in a few minutes.
Most POS vendors also offer self-help resources on their websites you can use to guide you through the setup process, or technical support over the phone.
Just keep in mind, a DIY setup does mean you have a higher chance of making a mistake with your configuration, and there’s always a risk you could miss out on enabling key features.
Professional Installation
If you have a more complex POS system, run multiple stores with larger product catalogues, or your retail operations are more complicated, a professional installation is best.
Many leading providers, like Revel can offer support with migrating your store data, setting up hardware, and uploading products.
They can also assist in training your team, integrating solutions with other apps, and configuring your technology to suit your specific needs. The benefit is that you save time on your installation, and can rest assured you’ll have the optimal setup. However, professional installation can be costly.
Step 4: Configuring your Software and Network Hardware
Regardless of which setup strategy you choose, you’ll need to configure your software. This is usually a straightforward process, which involves entering basic business information into a tool, such as your business name, credit card processing information, and banking information.
If your business is larger and more complex, you can send this information to your POS vendor to configure for you. Many POS vendors have a customer success team that can help most businesses with uploading SKUs, product information and more.
If you have a simpler system, you can usually add the information yourself via your POS dashboard on an iPad or computer. While you’re setting up your software, you’ll need to link your system to hardware components, and align your network.

Most businesses will have terminals, receipt printers, card readers, and routers that need to be connected via the internet. You can usually setup your network through Wi-Fi, Bluetooth, or USB connections. However, some complex systems require routers, ethernet cabling, and network switches.
Step 5: Setup Your Inventory Management System
The next step in figuring out how to setup a POS system, is configuring your inventory management technology. Inventory management tools are a core component of any POS solution for large and small business owners.
You should be able to track inventory in real-time, and manage your inventory and business operations both for your ecommerce store, and brick-and-mortar location.
First you need to import all the information you have about the products (stock) your retail business sells into your POS software. Depending on how you’ve tracked your products before implementing your POS, this could mean uploading Excel spreadsheet data, or importing information from existing tools, like your ecommerce platform.
If you choose professional installation, most vendors will assist retailers with implementing their stock list, so you can ask for extra help here.
However, if you’re a restaurant owner, your vendor might map your products to your POS system, but you’ll need to make sure you align your menu management strategy with your business requirements.
Once your inventory data is uploaded, you’ll need to add more information for each item., Retailers will need to enter details about item sizes and variations, while food and beverage businesses need to track ingredients for each product on a granular level. At this point you can:
- Set stock levels for the amount of product you have
- Categorize each item by product type (with seasonal information when necessary)
- Add descriptions to each product to identify and locate items
- Add vendor names, barcodes, and SKU information
After inputting all of your data, make sure all of the “automation” features you need are configured, so your system can track your inventory for you in real-time.
Step 6: Importing Customer Data
Now all your product information is in place, it’s time to import customer data. If your business h as an existing customer database, you’ll need to import this into your POS system. Many solutions will support standard Excel or CSV file import.
Make sure you update each profile with as much data as possible, from a customer’s physical address and email address to their phone number, occupation, age, and purchase history.
It’s also worth looking for options to segment your customers into different groups based on their preferences, and other factors. Some POS systems can even help you track down your VIP customers.
Using your segments, some POS systems will allow you to use built-in marketing tools or integrations to create loyalty programs, email marketing campaigns, and social media promotions. You can:
- Send custom email receipts to customers: Most POS systems allow retailers to customize email receipts and order messages with coupons and promotional information.
- Distribute automated surveys: You can send emails or text messages when a customer makes a purchase, with a survey asking questions about their experience.
- Create loyalty programs: most POS solutions allow users to set up points and rewards-based loyalty programs, to increase conversions and retention.
Step 7: Create Employee Accounts and Set Permissions
If, like most businesses, you have a team of staff members who need to access and use your POS solution, you’ll need to give them accounts. Once you’ve set up your product catalog and customer accounts, dive into the employee management tools on your POS system.
Most modern POS systems will allow you to designate specific roles to each employee when onboarding new staff into the system. Different permission levels on the right POS will ensure you can control who can process transactions, access data, and manage returns.
In a restaurant business, you might need more specific roles and permission levels for staff like bartenders, servers, and managers. Ensure each staff member has their own Pin or login, so you can track sales for each employee, and run performance reports.
Remember, individual user accounts are also crucial for businesses that have different employees using the same register or terminal at specific times.
Depending on the POS solution you choose, you might also be able to access add-ons for scheduling, time-tracking, and payroll. There are even tools that allow you to automatically generate payroll reports.
Step 8: Train and Support Your Team
Finally, you need to ensure your team can use your POS solution effectively. Even if you choose straightforward point of sale software, or basic POS systems for small business owners, there’s still a chance your team members will need training.
They’ll need to know how to set up and manage customer profiles, navigate the checkout process, and use your POS app to track inventory. They may also need an insight into how to send information to your accounting software, and manage different payment methods.
Most POS solution providers offer access to self-help resources on their websites. Tutorials, guides, and videos can help you with everything from configuring POS hardware, to training your teams.
Some of the best POS system providers will also offer additional hands-on support.
They might be able to host onboarding sessions for your new hires, give you manuals and documents you can distribute, and offer ongoing technical support. Depending on your business needs, it’s worth assessing the level of assistance offered by your POS system before you commit to a specific solution.
Setting Up your Point of Sale System
Learning how to set up a POS system can seem daunting, particularly for beginners. You need to make sure you’re choosing the right tool for your restaurant or retail store, create the right user accounts, and configure all of your data.
However, there are plenty of vendors that can also offer access to additional support if you need it.
FAQ
Setting up your POS system can be free if you take a DIY approach. However, if you’re investing in a specialist system and have complex needs, you may need to pay extra for dedicated support. Training, onboarding and configuration can cost over $500.
The right POS system will depend on the type of business you run, and your budget. You can explore everything from dedicated retail POS system options, to specialist solutions for scheduled service providers, hospitality businesses, and restaurants.
It all depends on the functionality you need, but we recommend options like Shopify POS for ecommerce retailers, Square for small businesses, and Clover for restaurants.


Comments 0 Responses